Content of this article:
Introduction and goals
It wasn’t too long ago that we stood in front of colleagues in different workshops and promised that we can realize our shown demo with “board means” and that’s exactly what we want to prove now.
In case you missed the article about the Product Manager Meeting (PMM) in Amsterdam, check out this article: Knowledge gets bigger when you share it
In advance – This was our demo at the Product Manager Meeting in Amsterdam (which by the way has now got a special place in our office):

We made the data from the QUINT elements and the CAPAROC modules available on Proficloud.io using Profinet and the PLCnext controller, activated the sent metrics for the Time Series Data Service, and then visualized them in the Time Series Data Service.
Goal: Basic monitoring for QUINT4 + energy storage and CAPAROC modules
The steps described here will ensure that you get an easy and profitable start with the Time Series Data Service on Proficloud.io using the components mentioned. You can extend your dashboards with additional data (already available) and tailor them exactly to your needs.
Preparation and setup
Steps for hardware installation
(Wiring may only be carried out by a qualified electrician)
- Installation on a demo board with DIN rail
- Provide QUINT Power supply with power cable
- Wire QUINT Power supply with QUINT UPS
- Wire QUINT UPS with Energy storage
- Wire QUINT UPS with PLCnext controller
- Connect QUINT UPS with CAPAROC module by Ethernet cable
- Wire Energy storage with CAPAROC Power Module
- Connect CAPAROC Power Module with PLCnext Controller by Ethernet cable
- Connect PLCnext Controller with Ethernet cable to LAN network
- Wire consumer to CAPAROC E2 Electronic Circuit Breaker
(Our consumer needed power supply for cooling and displaying current and electric voltage)
PLCnext Engineer installation
In order to extract the required information from the individual modules, we need certain preparations. One of our colleagues has coordinated with the colleagues responsible for CAPAROC and QUINT and created a program for the PLCnext Engineer (version 2023, with Npcap extension and the function block PLCNE_PS_DcUpsPN_1_20220627 (Downloads→Function block)), which we are happy to make available for download here: Download PLCnext Engineer project.
Set up your controller for the connection to Proficloud.io
(The controller should be on the same network as the PC used to perform the setup)
- Open the downloaded project
- At the project level, the IP address range to be used must now be assigned, as well as the IP address of the router
More details on how to do this: Configuring the IP settings - If the controller has no IP-address in the same IP-address range, this must still be changed
More details on how to do this: Connecting to the controller - Scan and edit connected Profinet components
(The individual components must be connected to the controller via Ethernet)
More details on how to do this: Configuring PROFINET® devices - After scanning, the connected components are displayed in PLCnext Engineer. The respective components can now be defined under Station name
- The project can now be played on the controller by right-clicking on the project and clicking on “write”
- The UTC time must now be set in the WBM of the controller, otherwise the device can’t get its first connection to Proficloud.io
More details on how to do this: Configuration – Date and Time- Call WBM of the controller
- Click on “Configuration”
- Click on “Date and Time”
- Enter server hostname: “0.poolntp.org”
- Click on “Apply”
- Click on “Refresh” for a test
- Log in to your Proficloud.io account or create one for free
- Register device using the UUID in the Device Management Service
The UUID can be found either on the PLCnext controller itself or in the WBM under the Configuration → Proficloud Services tab and under UUID - Once the device is registered, you can proceed in the WBM and in the same tab (Configuration) set check marks on the following items: Enable Connection, Proficloud Location (Frankfurt), Device Management and Time Series Data
- Then click “Apply” in the WBM, the device should connect to Proficloud.io if an internet connection is available and be displayed as online
Settings on Proficloud.io – Working in the Device Management Service and the Time Series Data Service
Once the device has connected, you can activate the sent metrics in the Device Management Service.
- Click on the device you just added and navigate to the “Services” tab in the device
- Click on “Assign Metrics” to activate the data of the controller in the Time Series Data Service
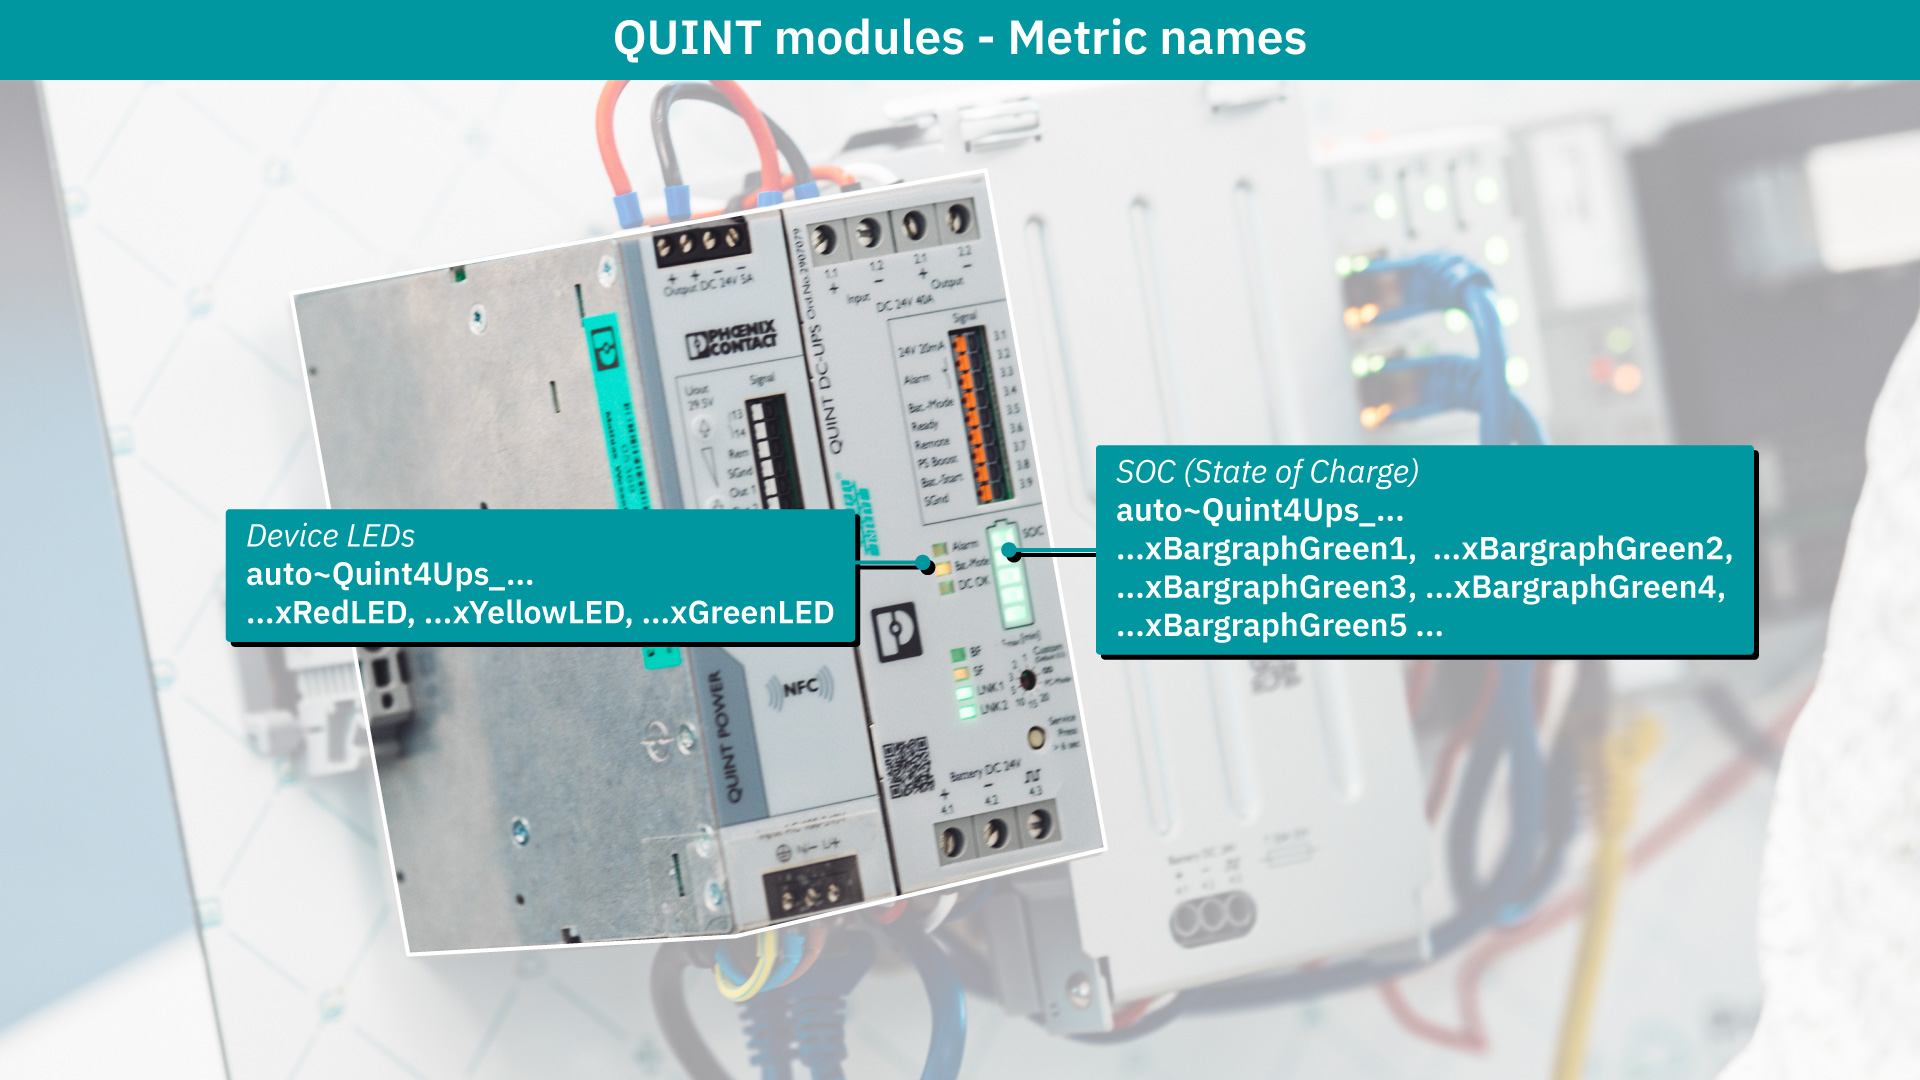
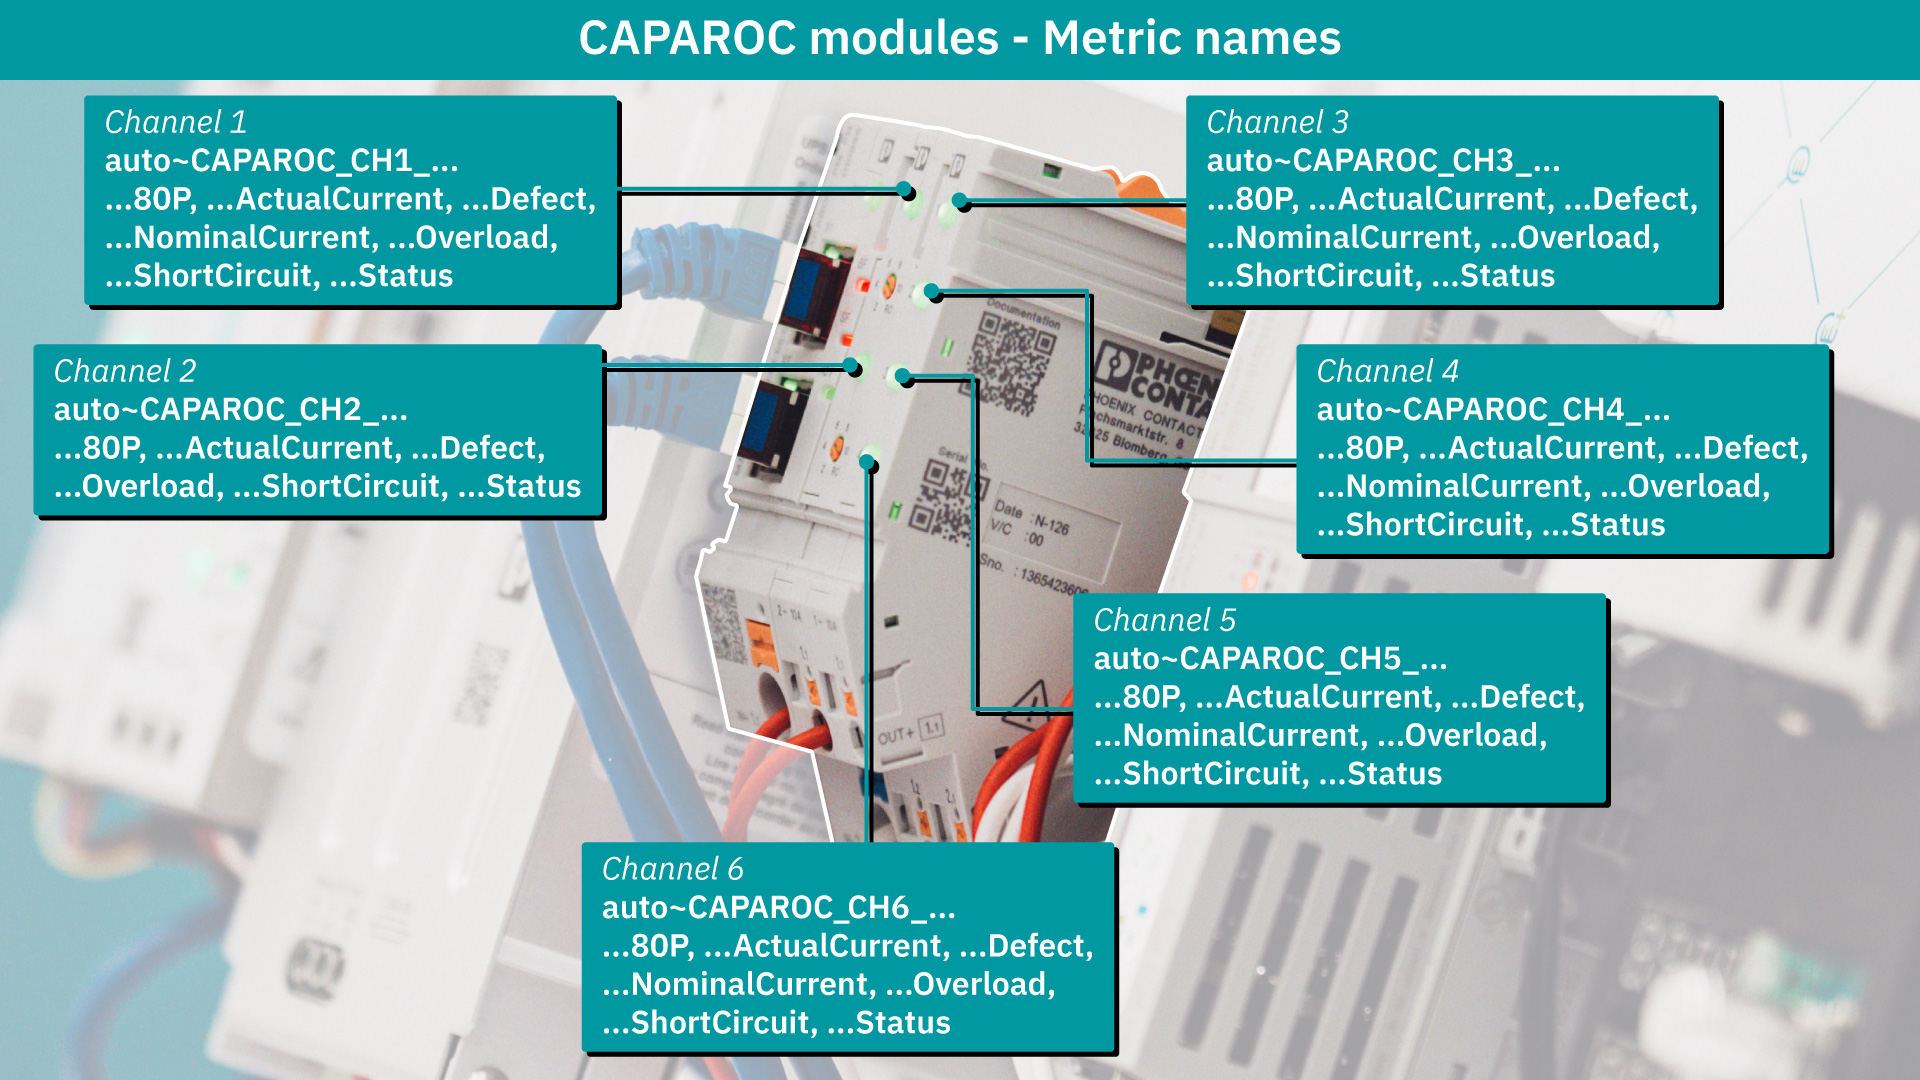
(Note: Since the components send a lot of data, you will need at least the Time Series Data Service Package TSD200 with 200 metrics available. If you only want to use data from QUINT for testing purposes, the free package with 20 metrics is sufficient for this purpose. This package is available in every organization and does not need to be booked.) - The metrics are named to accurately reflect the status of the devices. For better differentiation, the name of the hardware is prefixed
Downloads and template customizations
(In the project, all settings have already been made for the same setup. This means that connections between the individual components are established, metrics are defined and data can be supplied. If the installation is different, the project must be adapted using these instructions (QUINT POWER and CAPAROC: Configuration in PLCnext Engineer, QUINT4-UPS/24DC/24DC/40/PN (Downloads → E-Learning)).
Open the templates in a text editor and find all “REPLACEME” parts and replace them with the UUID of your controller.
Import templates in the Time Series Data Service
- Click on “Time Series Data Service” in the left navigation bar and open the Time Series Data Service
- Hover with the mouse pointer over the “+” in the left navigation bar and then click on “Import”
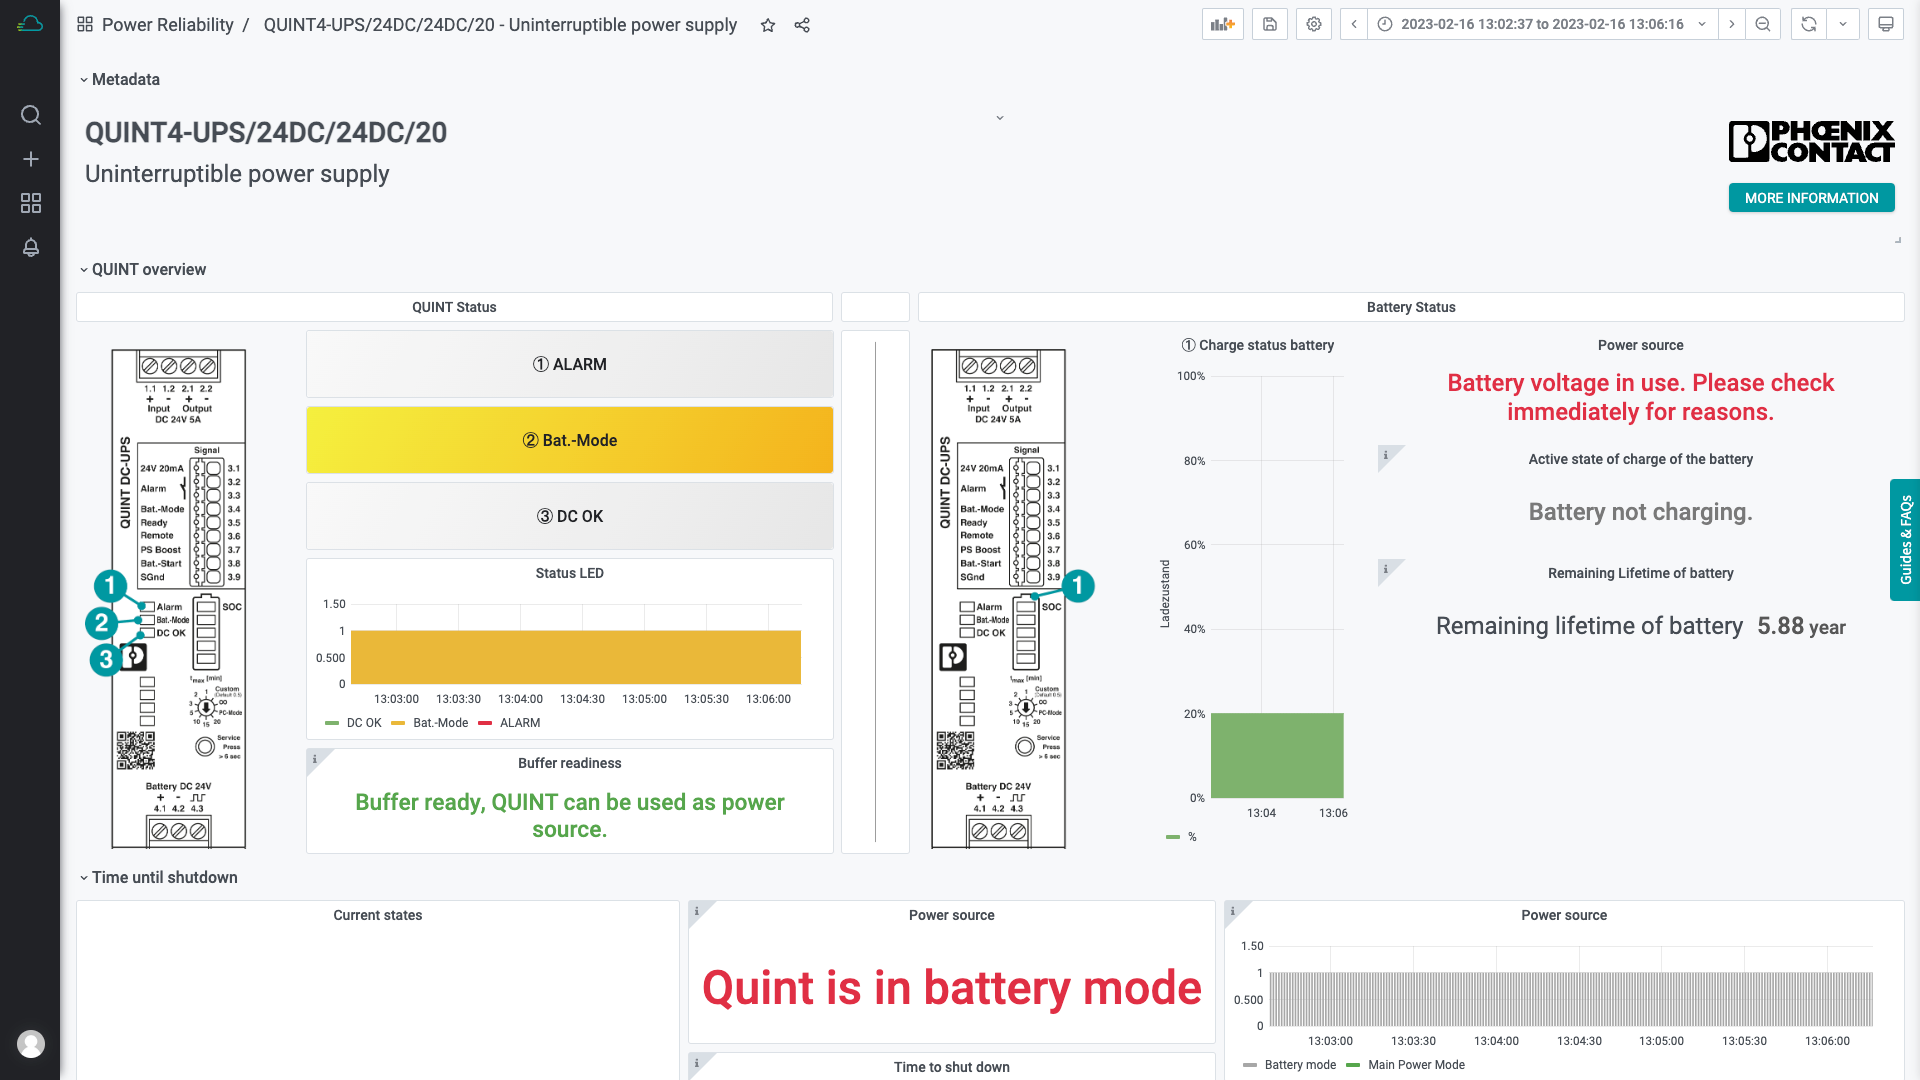
- Import the file QUINT-Monitoring.json. If the connection is active, you should already see the first incoming data
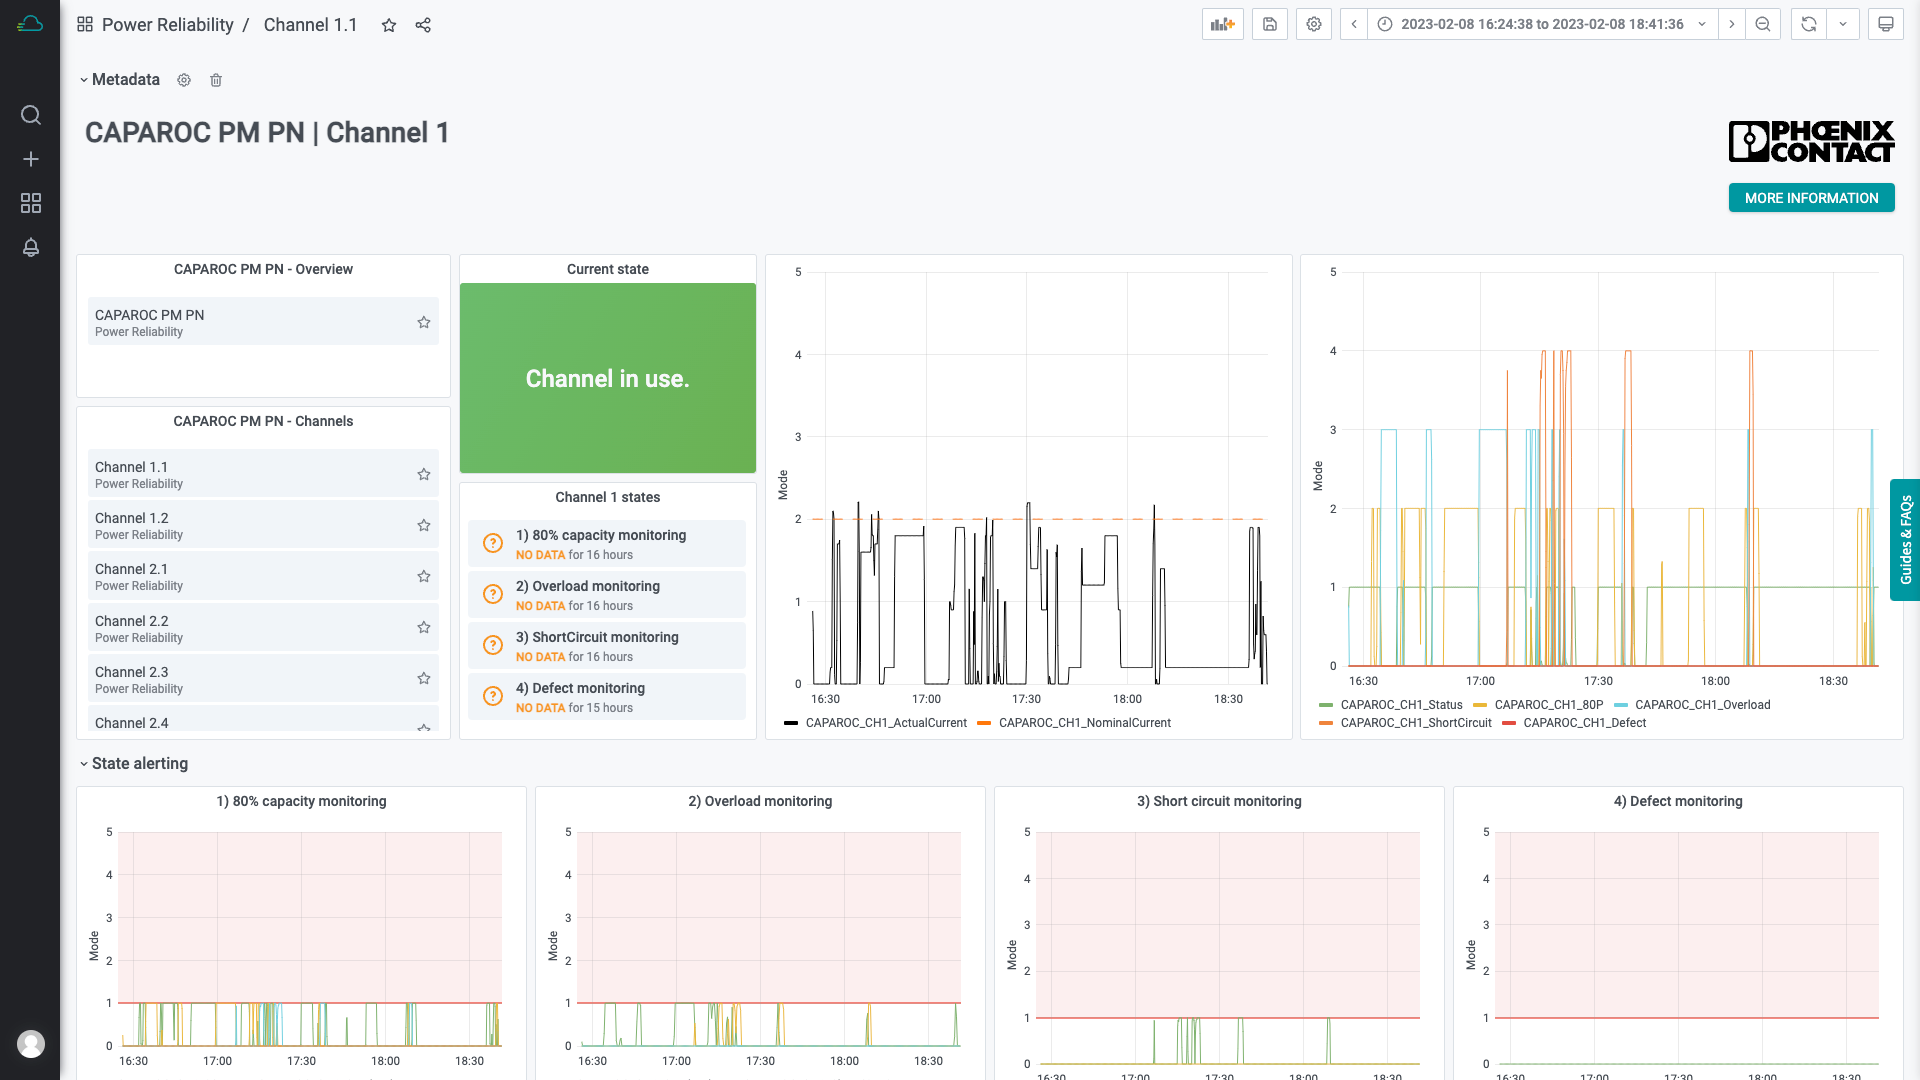
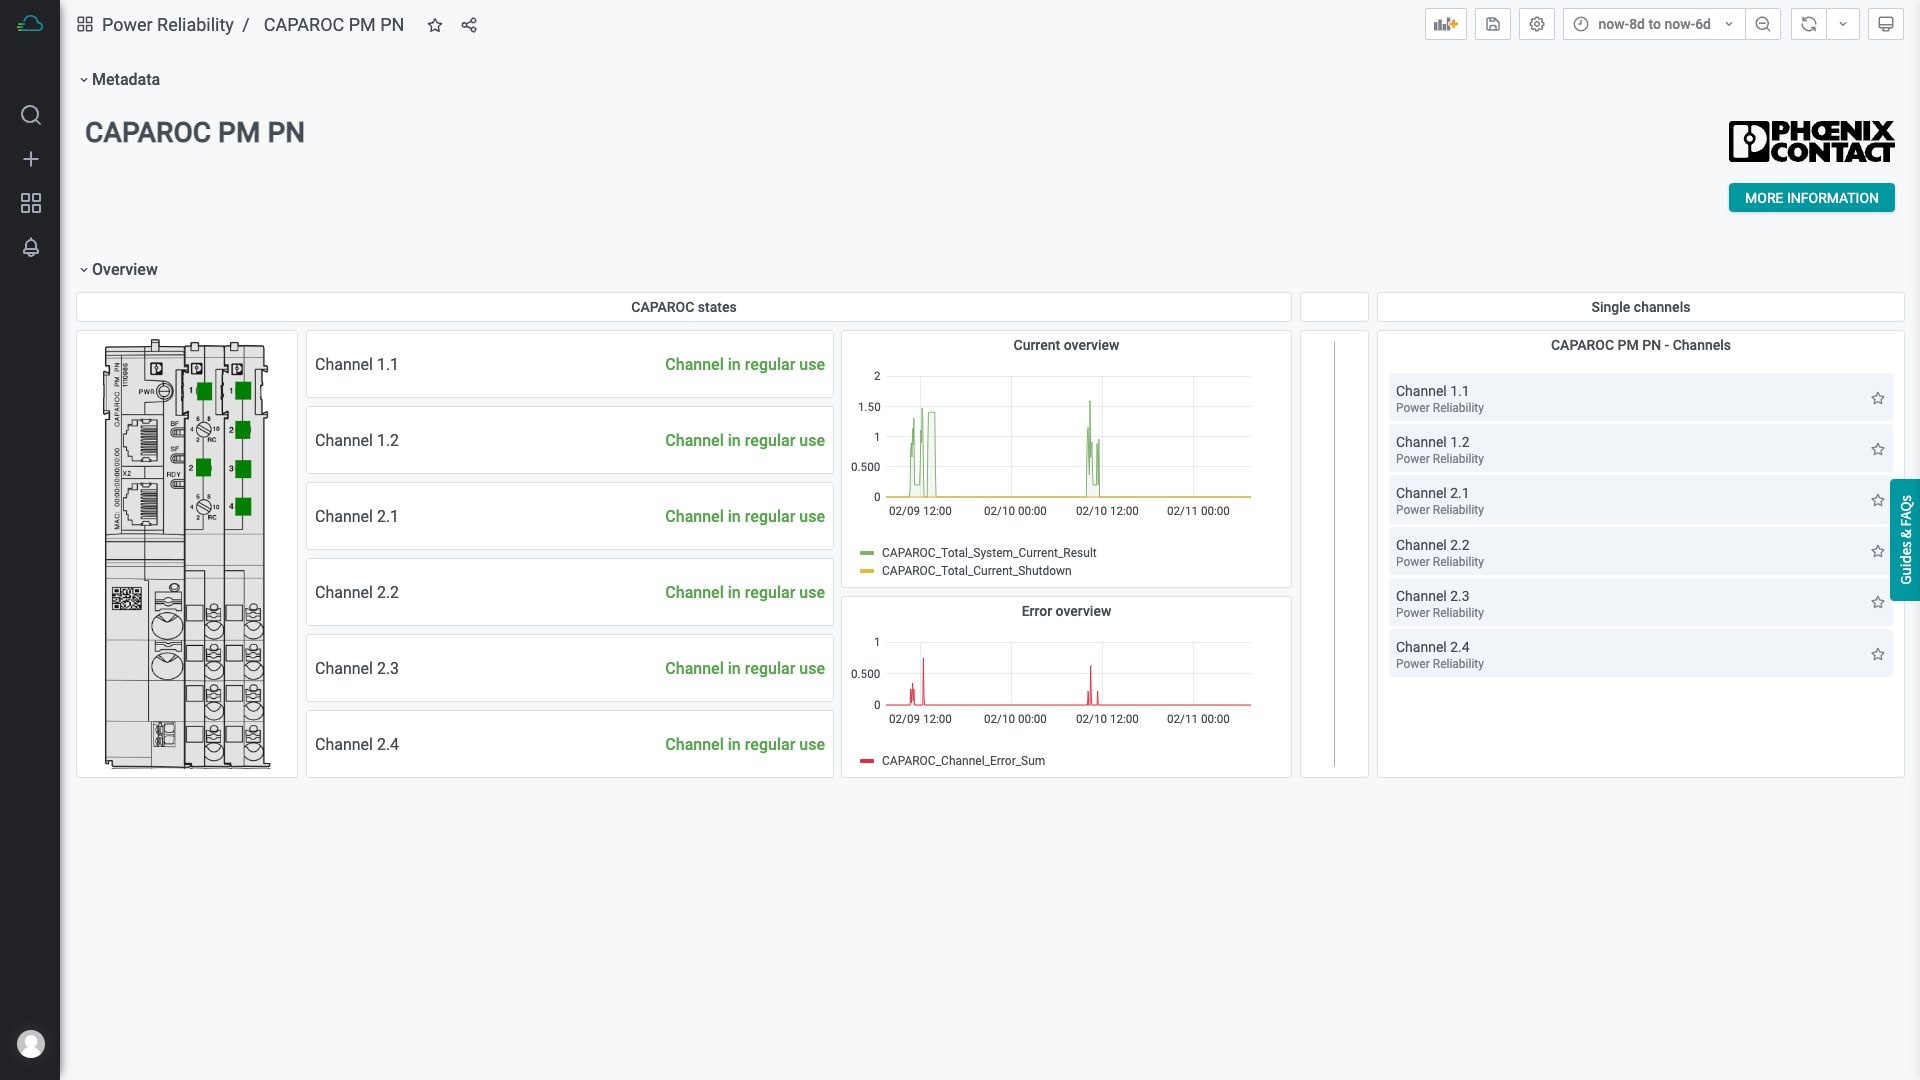
- Import the file CAPAROC-Monitoring.json. If the connection is active, you should already see the first incoming data
Some metrics (both QUINT monitoring and CAPAROC monitoring) are not yet in use. The dashboards show a very simple status of the hardware, you can from now on improve the dashboards with more (already active) metrics and tailor them to your needs.
That’s it – you created a simple and effective monitoring for Power Reliability hardware.
If you have any questions regarding the dashboards and Proficloud.io, just get in contact! We are just one email away…